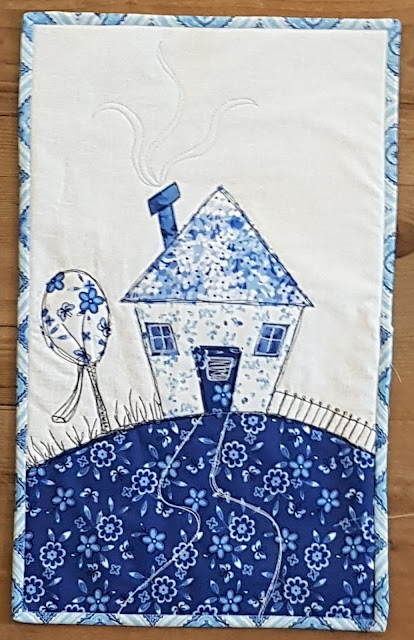
The joy of free motion embroidery
is just that – you are free to go wherever you like! You can experiment with
colours, threads and you control where the machine stitches, so the only limit
is your imagination. Free motion embroidery and free motion quilting use the
same tools and skills, so once you get some practice in one, you will be able
to do both. You can use my template called Home because it
gives us something to stitch around – we all know how intimidating a blank
piece of paper can be! This is our little safety net and a good place to start.
Home – there is a template here.
Free motion embroidery can be used to add texture as well as design to a piece – the closer the design is stitched, the stiffer the result will become. This means that tight stitching can be used to add structure as well as design to bags, cushions, book covers, even quilts.
The basic premise is that if you can draw a design on a piece of paper without lifting your pencil off the surface – then you can use it as a free-motion design.
For this project you will need:-
- 12 x 18 inch quilt sandwich for your design. Use white fabric for the tops of each piece.
- Scraps of coloured fabrics for your design. You can use bright colours or pastels – patterns work best if they are small.
- A piece of HeatnBond or Bondaweb – approximately A4 size.
- Mixed selection of sewing machine threads in whatever colours you have.
- Free motion foot.
- Sewing machine in good working order.
- Iron and ironing board/mat.
- Scissors
So what machine do you need to use?
The answer to that is a simple one – any machine you like! As long as it does a straight stitch, you can do free motion embroidery on it. A zigzag stitch can also be used but if you don’t have it, don’t worry!
Put on your foot
Put your embroidery foot on your machine. You cannot
really do free motion embroidery without one.
Preparing your machine.
Drop feed dogs - Drop your feed dogs according to the instructions in your manual. If you can’t do this, your machine may have a cover plate which will slide over and prevent them engaging with your fabric. If you find that you get tension issues with the feed dogs down, then you could try this second option.
The other option is to leave your feed dogs up (horror of horrors!) but set your stitch length to 0. This stops the feed dogs dragging your fabric in a direction you don’t want to go, but can help with those obstinate tension issues,
Transferring the design to Bondaweb.
Roughly cut the shapes out and place onto the back of your fabric pieces with the paper side up. Press with your iron until the pieces stick. Now cut around the shapes and remove the paper backing.
Cut
a piece of ground/ hill and pin in place. You will need to place
your pieces onto your prepared background with the back-ground pieces laid
first, and tuck under the hill.
Let your creativity fly. Once you are finished, you can choose to bind it as a wall hanging, or make it into a cushion.
Please feel free to post pictures of your finished projects to Sarah’s Facebook page www.facebook.com/SarahPayneQuilter


wonderful job digitize embroidery service very amazing !@#$
ReplyDelete